This tutorial outlines steps to install and configure Apache Cassandra using Docker. Docker provides an easy way to create an Apache Cassandra cluster. Using Docker we will get an Apache Cassandra cluster up and running in minutes. The configuration provided is only meant for development and testing purposes. We will begin this tutorial by providing an overview of Docker and Docker Compose. We will then go on to provide configuration to setup a three-node Apache Cassandra cluster. The tutorial concludes by outlining different ways of interacting with the created cluster.
Docker Overview and Benefits
Docker is a container technology. It has become immensely popular with both developers and system administrators. Docker simplifies creation, deployment, shipping and running of applications. It enables you to configure your application once and run it anywhere. Most of Dockers benefits are a result of Dockers ability to isolate applications and their dependencies. Think of Docker as a lightweight Virtual Machine (VM).
High-level difference between virtual machines and containers
Docker is often compared/confused with a VM. A VMs primary benefit is the ability to share hardware resources. VMs also had many side benefits i.e. the ability to create isolated environments. As VMs grew in popularity they were often used to ship and deploy preconfigured applications. In fact, every cloud provider made available VMs with preconfigured proprietary and open source software (OSS). Pre-configured software on VMs is very popular. Although popular, VMs are a heavyweight approach to building and shipping pre-configured software.
Containers provide a lightweight approach to virtualisation. To understand the surging popularity of containers we must understand the difference between containers and VMs. Both containers and VMs are virtualisation technologies. While VMs virtualize hardware, containers virtualize the operating system.VMs run on top of a hypervisor i.e. a piece of software, firmware, or hardware that allows multiple operating systems (OS) to share the same hardware. A hypervisors main goal is to abstract away the OS from hardware. Thus VM’s emulates the entire operating system.
The main goal of a container is to abstract away the application from the operating system. Containers abstract away the “user space” i.e. the portion of memory where user processes run. Containers aka operating-system-level virtualization is a method of virtualization where the kernel of the operating system allows the existence of multiple user spaces. As a result, multiple user spaces share the same kernel. Virtualization at the operating system level provides a lightweight approach to application isolation. Containers can startup in approximately 500ms as opposed to VM which typically takes 20 seconds.
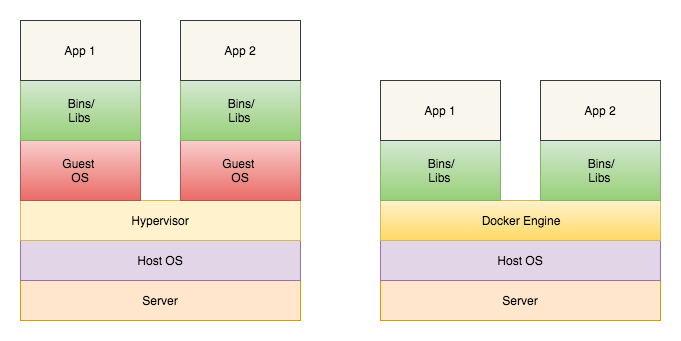
Docker vs Virtual Machines
The image above illustrates the high-level difference between VMs and containers. Note a type 2 hypervisors ( one that runs on top of an OS ) is depicted above.
Containers are not a new concept. Although they have been around for a while they have remained unpopular. This was mainly because containers were hard to configure and use. Docker changed all that. Docker provided an API wrapper and tooling around containers. This made containers way easier to use. Docker has grown into a full-blown ecosystem. It has a growing number of tools to help build, configure, share and ship containers.
Below is a list of key concepts/tools to get started with Docker
- Docker Images – An immutable file that is a snapshot of the container. An instance of an image is a container. Docker images are composed of layers of other images. This enables efficient network transfer when exchanging image data over a network.
- Docker Hub – A public registry that enables users to search and share Docker images. Docker Hub is a great resource for getting hold of popular open source Docker images.
- Docker Compose – An important tool that enables you to work with multi-container applications. It provides an efficient way of configuring, starting and stopping multi-container Docker applications.
Docker Apache Cassandra Cluster
Let’s create a three node Apache Cassandra cluster. In order to create this cluster, you will need to have Docker and Docker Compose installed. Use Docker and Docker Compose installation documentation to get them both up and running on your machine.
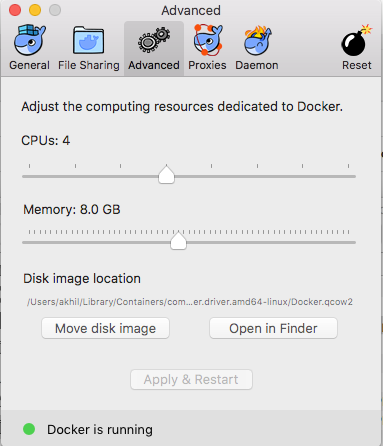
Resource Configuration in Docker for Mac
In case you are on a Mac or Windows machine, you will need to allocate enough memory for the cluster to run. Each node needs at least 2 GB of memory and thus I would suggest an 8GB allocation. On Mac and Windows, Docker uses virtualisation technology and thus the need to allocate dedicated resources. On Linux, the Docker engine runs natively and will be able to reserve the required resources provided it is supported by the underlying hardware.
Once you have installed Docker and Docker Compose create a Docker Compose file. Call the file docker-compose.yml and place it in an empty directory of your choice. For the purpose of this tutorial, it is important to call the file docker-compose.yml.
Please copy the contents of the Docker Compose file below into your docker-compose.yml. In order to create an Apache Cassandra container, we need an appropriate image. We will use the official Apache Cassandra image. The compose file is well commented and provides details on every choice made.
|
1 2 3 4 5 6 7 8 9 10 11 12 13 14 15 16 17 18 19 20 21 22 23 24 25 26 27 28 29 30 31 32 33 34 35 36 37 38 39 40 41 42 43 44 45 46 47 48 49 50 51 52 53 54 55 56 57 58 59 60 61 62 63 64 65 66 67 68 69 70 71 72 73 74 75 76 77 78 79 80 81 82 83 84 85 86 87 88 89 90 91 92 93 94 95 96 97 98 99 100 101 102 103 104 105 106 107 108 109 110 111 112 113 114 115 116 117 118 119 120 121 122 123 124 125 126 127 128 129 130 131 132 133 134 135 136 137 138 139 140 141 142 143 144 145 146 147 148 149 150 151 |
# Please note we are using Docker Compose version 3 version: '3' services: # Configuration for our seed cassandra node. The node is call DC1N1 # .i.e Node 1 in Data center 1. DC1N1: # Cassandra image for Cassandra version 3.1.0. This is pulled # from the docker store. image: cassandra:3.10 # In case this is the first time starting up cassandra we need to ensure # that all nodes do not start up at the same time. Cassandra has a # 2 minute rule i.e. 2 minutes between each node boot up. Booting up # nodes simultaneously is a mistake. This only needs to happen the firt # time we bootup. Configuration below assumes if the Cassandra data # directory is empty it means that we are starting up for the first # time. command: bash -c 'if [ -z "$$(ls -A /var/lib/cassandra/)" ] ; then sleep 0; fi && /docker-entrypoint.sh cassandra -f' # Network for the nodes to communicate networks: - dc1ring # Maps cassandra data to a local folder. This preserves data across # container restarts. Note a folder n1data get created locally volumes: - ./n1data:/var/lib/cassandra # Docker constainer environment variable. We are using the # CASSANDRA_CLUSTER_NAME to name the cluster. This needs to be the same # across clusters. We are also declaring that DC1N1 is a seed node. environment: - CASSANDRA_CLUSTER_NAME=dev_cluster - CASSANDRA_SEEDS=DC1N1 # Exposing ports for inter cluste communication expose: - 7000 - 7001 - 7199 - 9042 - 9160 # Cassandra ulimt recommended settings ulimits: memlock: -1 nproc: 32768 nofile: 100000 # This is configuration for our non seed cassandra node. The node is call # DC1N1 .i.e Node 2 in Data center 1. DC1N2: # Cassandra image for Cassandra version 3.1.0. This is pulled # from the docker store. image: cassandra:3.10 # In case this is the first time starting up cassandra we need to ensure # that all nodes do not start up at the same time. Cassandra has a # 2 minute rule i.e. 2 minutes between each node boot up. Booting up # nodes simultaneously is a mistake. This only needs to happen the firt # time we bootup. Configuration below assumes if the Cassandra data # directory is empty it means that we are starting up for the first # time. command: bash -c 'if [ -z "$$(ls -A /var/lib/cassandra/)" ] ; then sleep 60; fi && /docker-entrypoint.sh cassandra -f' # Network for the nodes to communicate networks: - dc1ring # Maps cassandra data to a local folder. This preserves data across # container restarts. Note a folder n1data get created locally volumes: - ./n2data:/var/lib/cassandra # Docker constainer environment variable. We are using the # CASSANDRA_CLUSTER_NAME to name the cluster. This needs to be the same # across clusters. We are also declaring that DC1N1 is a seed node. environment: - CASSANDRA_CLUSTER_NAME=dev_cluster - CASSANDRA_SEEDS=DC1N1 # Since DC1N1 is the seed node depends_on: - DC1N1 # Exposing ports for inter cluste communication. Note this is already # done by the docker file. Just being explict about it. expose: # Intra-node communication - 7000 # TLS intra-node communication - 7001 # JMX - 7199 # CQL - 9042 # Thrift service - 9160 # Cassandra ulimt recommended settings ulimits: memlock: -1 nproc: 32768 nofile: 100000 # This is configuration for our non seed cassandra node. The node is call # DC1N3 .i.e Node 3 in Data center 1. DC1N3: image: cassandra:3.10 # In case this is the first time starting up cassandra we need to ensure # that all nodes do not start up at the same time. Cassandra has a # 2 minute rule i.e. 2 minutes between each node boot up. Booting up # nodes simultaneously is a mistake. This only needs to happen the firt # time we bootup. Configuration below assumes if the Cassandra data # directory is empty it means that we are starting up for the first # time. command: bash -c 'if [ -z "$$(ls -A /var/lib/cassandra/)" ] ; then sleep 120; fi && /docker-entrypoint.sh cassandra -f' # Network for the nodes to communicate. This is pulled from docker hub. networks: - dc1ring # Maps cassandra data to a local folder. This preserves data across # container restarts. Note a folder n1data get created locally volumes: - ./n3data:/var/lib/cassandra # Docker constainer environment variable. We are using the # CASSANDRA_CLUSTER_NAME to name the cluster. This needs to be the same # across clusters. We are also declaring that DC1N1 is a seed node. environment: - CASSANDRA_CLUSTER_NAME= dev_cluster - CASSANDRA_SEEDS=DC1N1 # Since DC1N1 is the seed node depends_on: - DC1N1 # Exposing ports for inter cluste communication. Note this is already # done by the docker file. Just being explict about it. expose: # Intra-node communication - 7000 # TLS intra-node communication - 7001 # JMX - 7199 # CQL - 9042 # Thrift service - 9160 # Cassandra ulimt recommended settings ulimits: memlock: -1 nproc: 32768 nofile: 100000 # A web based interface for managing your docker containers. portainer: image: portainer/portainer networks: - dc1ring volumes: - /var/run/docker.sock:/var/run/docker.sock - ./portainer-data:/data # Enable you to access potainers web interface from your host machine # using http://localhost:10001 ports: - "10001:9000" networks: dc1ring: |
To boot the cluster navigate to the directory where you have created the Docker Compose file and run the following command:
|
1 |
docker-compose up -d |
By default, Compose looks for docker-compose.yml. If you have named you file differently you must use the -f flag. Example command follows:
|
1 |
docker-compose -f docker-compose-different.yml up -d |
On starting up the containers you should see the similar output.
|
1 2 3 4 5 |
Creating network "cassandraDockercompose_dc1ring" with the default driver Creating cassandraDockercompose_portainer_1 Creating cassandraDockercompose_DC1N1_1 Creating cassandraDockercompose_DC1N2_1 Creating cassandraDockercompose_DC1N3_1 |
The above compose file will start up four containers. When you do this for the first time it will take a few minutes as the Apache Cassandra and Portainer images are downloaded from Docker Hub. The image used is configured in the command option in the Docker Compose file. Starting up Apache Cassandra for the first time will be slow. This is because we need to provide a lag between starting up each node. Apache Cassandra recommends the ‘2 minute rule’. When booting up you must give 2 minutes between booting up each new node. It is a mistake to start up all nodes at once. Please note I have given 60 seconds which is suffice for the current configuration.
Once the containers are up and running please navigate to the Portainer UI at http://localhost:10001. Portainer provides a web UI over Docker. I find it an easy way of managing/interacting with Docker containers.
When you log in for the first time you will see the following screen.
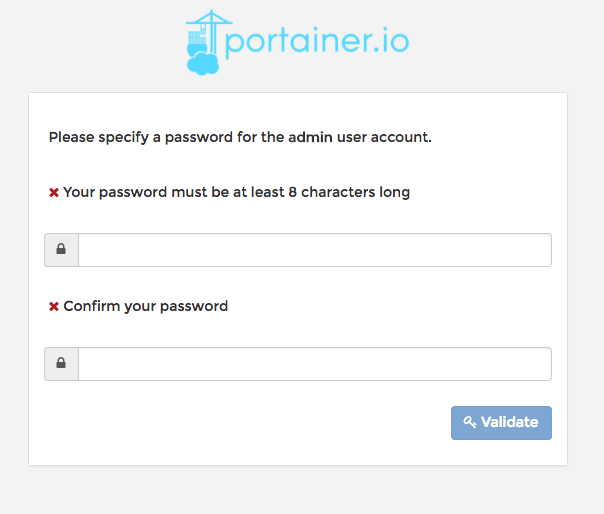
Portainer specify admin password screen
Please choose an appropriate password. As you might have already guessed this will only happen the first time you start the containers.
Next Portainer will ask you about the Docker engine instance you want to connect to. Currently, we just want to connect to the local instance. Please choose the “Manage the Docker instance where Portainer is running” option.
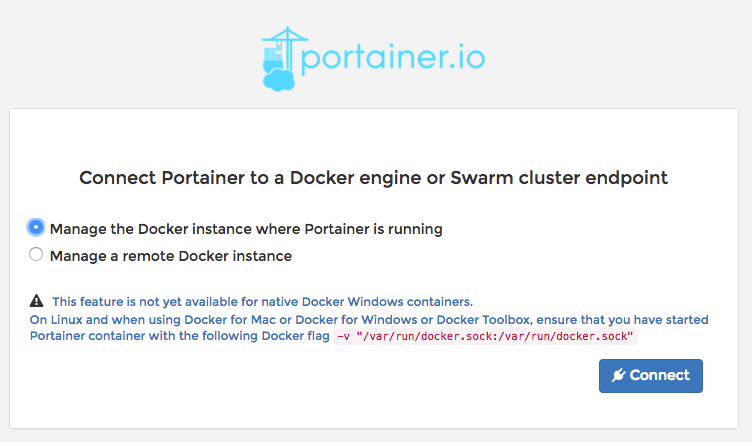
Docker engine configuration screen
Once you connect to you local docker engine you will be redirected to the Portainer home screen.
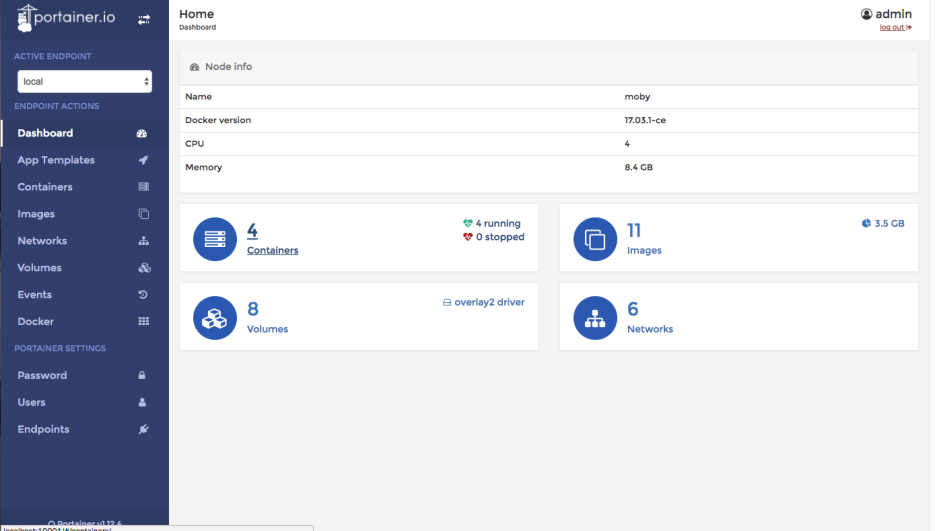
Portainer Home Screen
You will see the four containers that have been created. Click on the “Containers” menu item to see a list of your containers.
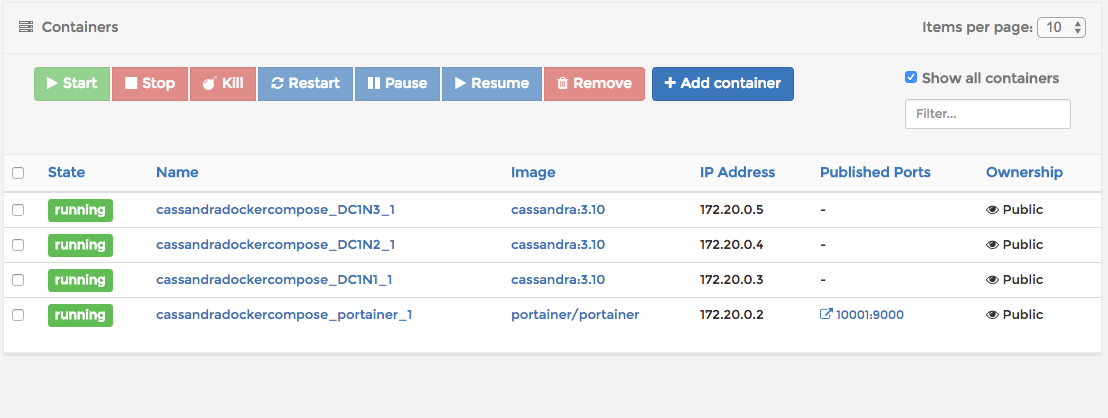
Cassandra Cluster Containers
You can get container details by clicking on any of the containers. Click on the cassandradockercompose_DC1N1_1 link. This will take you to the container details screen.
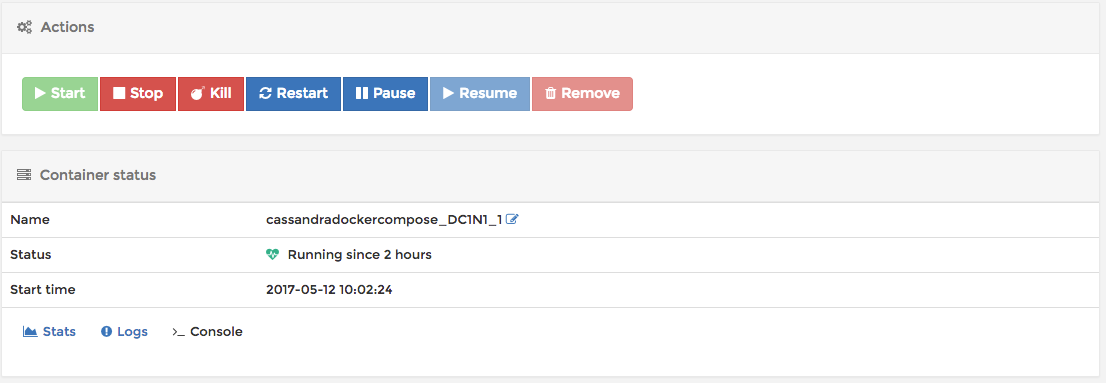
Portainer Container Details Screen
The container details screen enables you to access basic container stats and logs. You can also SSH into the console using the “Console” link. Please click on the console link and connect to a bash console. You should see a bash console as shown in the screenshot below.
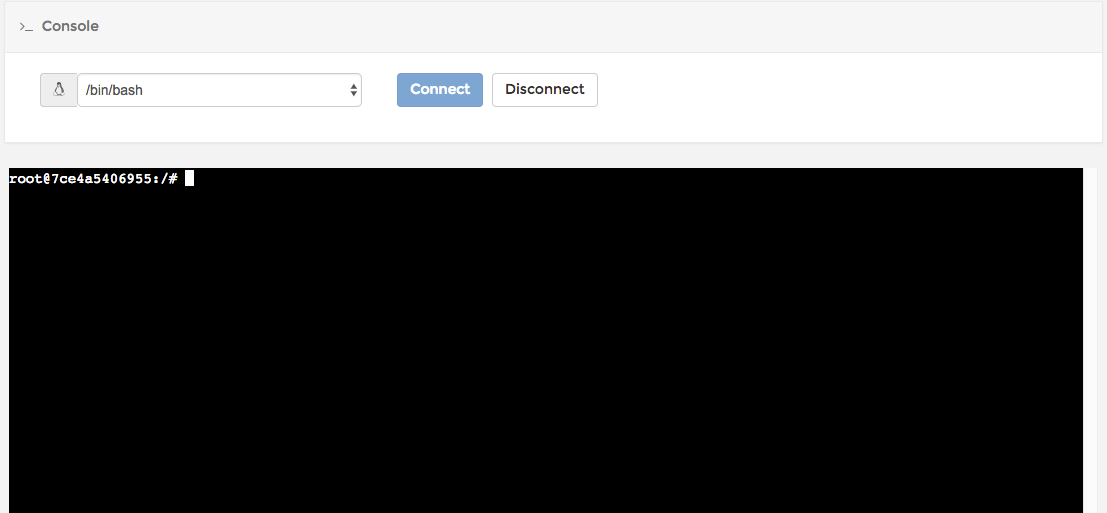
Portainer Bash console
Let’s quickly check if all three nodes in our cluster are up. We will do this by running the nodetool status command. 
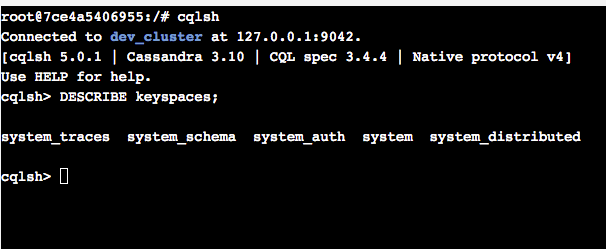
As you can see all three nodes are up. You can also connect to Apache Cassandra using the cqlsh command. Simply type cqlsh in the command prompt.
I hope, this has given you a good overview of how to create an Apache Cassandra cluster using docker. A good way to explore your cluster would be via a CQL tutorial.
Love to hear your thoughts?
References:
Thanks, excellent tutorial.
Thanks for the feedback appreciated.
Good tutorial, but what is http://templates/templates.json all about? That doesn’t resolve to anything useful on my system… so my portainer image doesn’t run.
Thanks. For the purpose of this tutorial that line can be removed. I have updated the compose file. Templates are a neat feature that enable you to configure what shows up under the “App Templates” menu item. App templates enable you to launch docker containers with a single click.
All the cassandra dockers are going down after 60 seconds
All the cassandra dockers are going down after 60 seconds
I am guessing you are running out of memory on each node.
Excellent guide.
Is it possible to use sstable tools like sstableloader or sstabledump in a cassandra container?
Thanks Yes, it is. Just like running nodetool status you can also run sstableloader and sstabledump.:Logged into the container via Portainer and run these commands.
Holy, this is awesome, will you have any upcoming tutorial for Cassandra cluster with Elasticsearch ? That could get lots of attention if you make one since everyone always talk about scalability
could you please share the docker compose configuration for running nodes in different hosts(virtual machines)
could you please share the config for running the seed node in one vm and the other nodes in another vm ie different data center same cluster